Anyways Friday was one of my DD's little friends birthday. I was told she had WAY too many toys so I made her two things. One you have already seen (on my blog) and now I get to share with you the last one that Scrapbookpal.com helped make happen! Gotta love those guys and the free shipping for all orders over 25.00 in the continental U.S. WOOHOO!
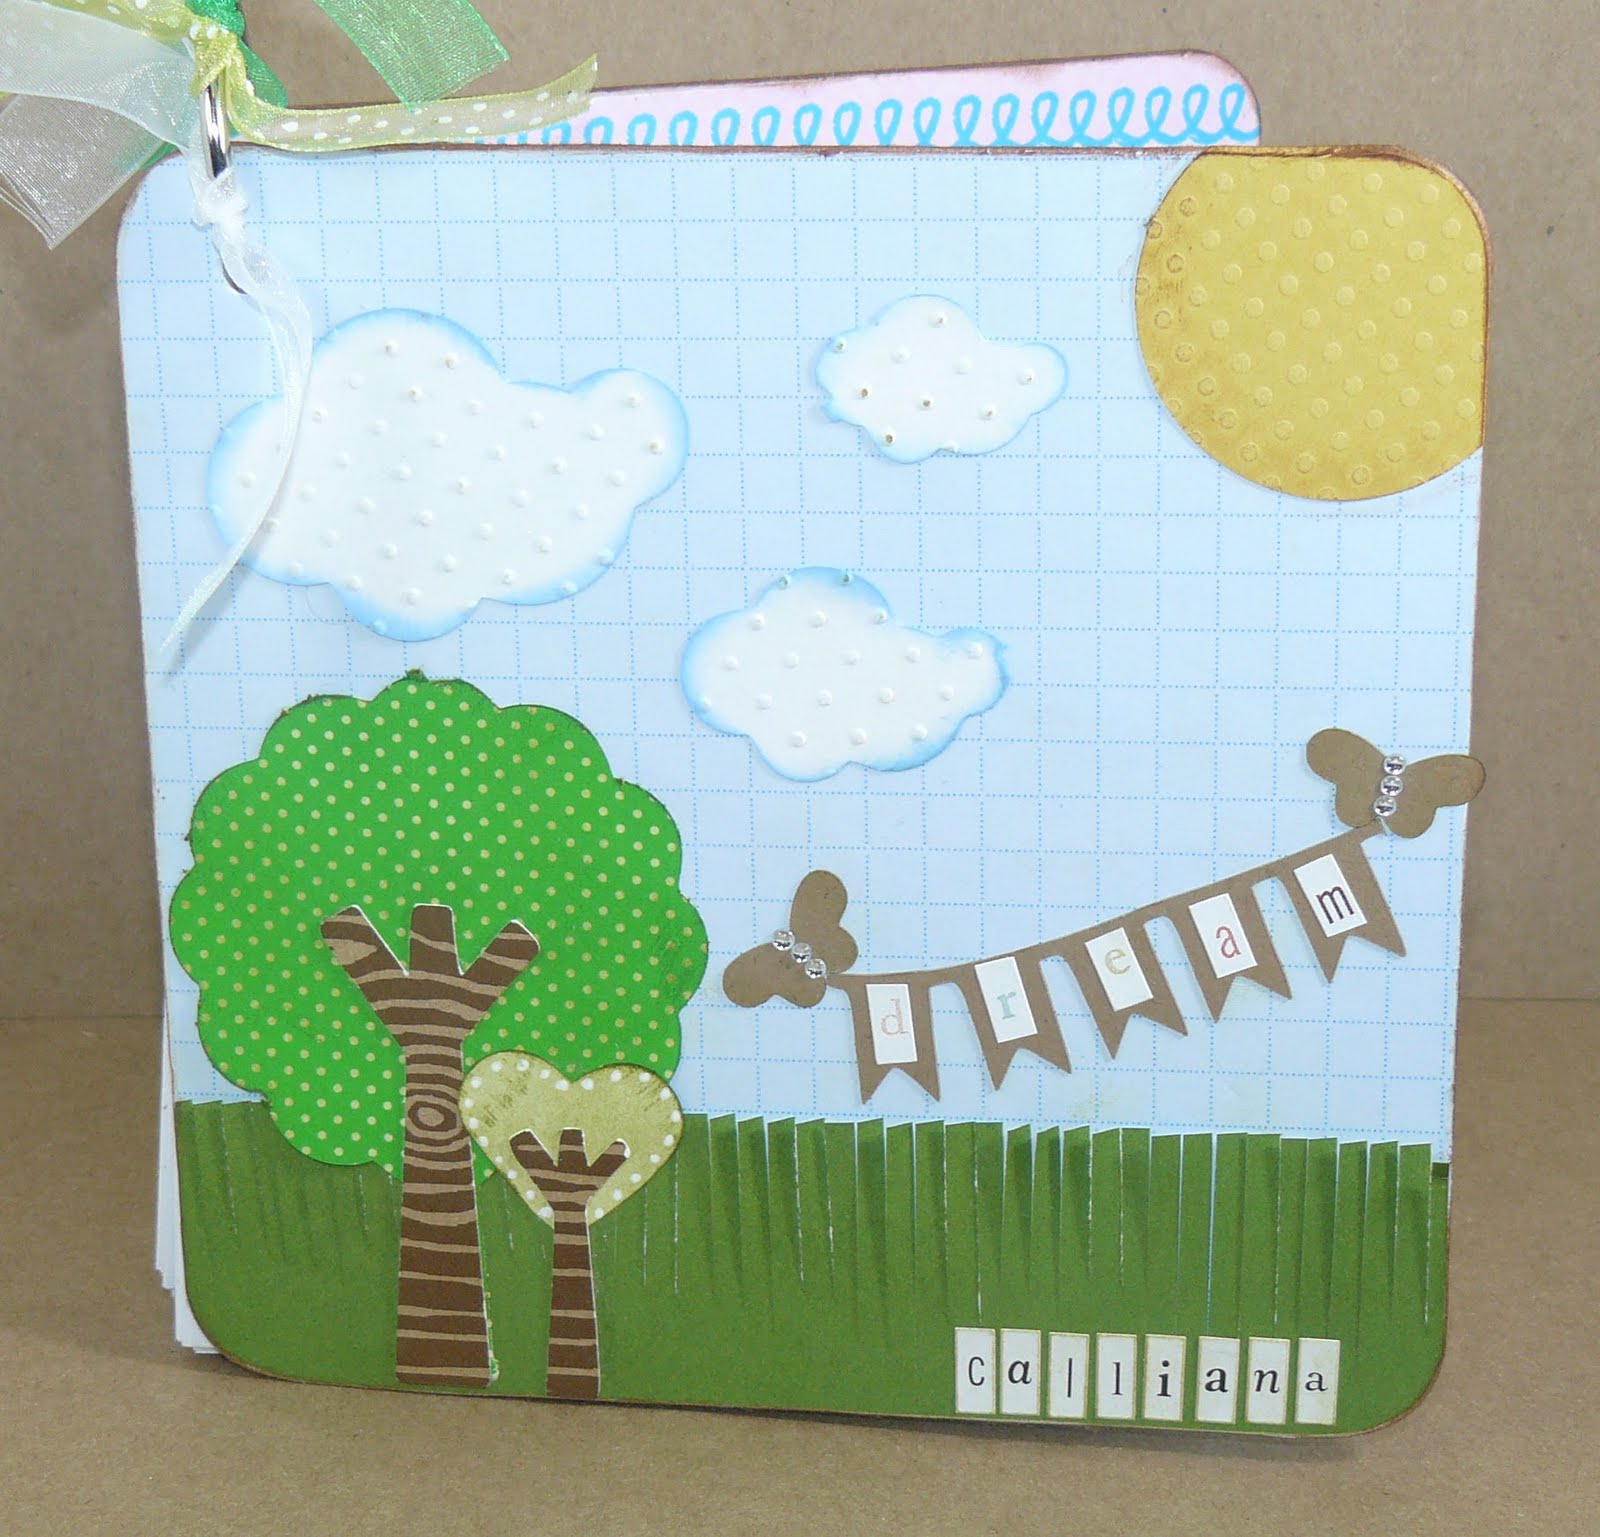
Thanks to them I was able to use April Showers and the awesome Signo Uniball white pen (LOVE THESE!) and make this adorable 6X6 doodle pad for the little girl. She likes to draw and I figured she could keep this in the car with a pen or pencil attached to the ring. What do you think?


Lets get started! You will need the following to do this project:
MS Fringe scissors
cutter bees
tweezerbees
chestnut roan
french blue
cuttlebug
Swiss dots
signo uniball pen
zig chisel
peeled paint
blender and foam
crop a dile
basic grey file system
april showers
mats
expression
atg gun
atg adhesive
tiny letters
sticko shimmering dots
heart punch
1.75 circle punch
white, yellow, Kraft, blue and green card stock
lots of printer paper
ribbon
metal ring
2 6X6 chipboard
Directions:
1. Using your 12X12 Expression mat, Expression and April showers cut the second tree (both layers) at 3.5 and 2 inches using appropriate paper.
2. Clouds will be cut at 1.5, 1 and .75 inches out of white and run through the cuttlebug using the Swiss dots folder and inked with french blue chalk ink.
3. Using Kraft paper cut the blank banner at 1 inch, dispose of last piece so you only have five banners.
4. Using Kraft paper cut the shadow butterfly at .75 inches twice.
5. Cut a 1.5 by 6 inch piece of green card stock then using Martha Stewart fringe scissors create grass, ink as needed.
6. Using 6X6 pieces of paper (pattern you choose) cover all sides of the two chipboard bases making sure to file in a downward motion to get a flush edge and to punch the hole each time with your crop a dile.
7. Now let's assemble. Adhere grass to bottom with ATG tape, adhere trees together (one uses a heart punch for the tree part and white doodling for extra detail), then place on the far right of the page.
8. Using a 1.75 inch circle punch create your sun, adhere with ATG tape, ink and file as necessary.
9. Adhere clouds wherever you see fit.
10. Adhere sticko shimmering dots to butterflies bodies, ink if desired.
11. Adhere tiny letter stickers to spell "Dream" on banner, then adhere with Zig chisel pen to board and place/adhere butterflies as if they are carrying it.
12. Spell the recipients name with little letter stickers on bottom left.
13. Decorate metal ring with various sheer ribbons.
14. Ink all outer edges of books with chestnut roan ink.
15. Cut, stack and punch a hole in a good amount of printer paper (5.5 by 5.5) as your filler.


No comments:
Post a Comment
Thank you for leaving me some love, it really makes my day!